Engineers need to know how the soil actually functions in place before they can assess soil heat dissipation or create safe, effective underground cable systems. On-site thermal resistivity testing provides precise, depth-specific data collected in practical settings.
A common technique for determining how much the soil resists heat flow at a specific depth, typically where infrastructure will be buried, is thermal resistivity field testing. Because it captures the soil’s natural moisture and compaction conditions, this is different from laboratory testing.
Field testing reveals the behavior of the soil precisely where the work will be done, whereas lab testing can regulate temperature and moisture. Results from samples alone may differ significantly depending on layering, moisture, and actual ground conditions.
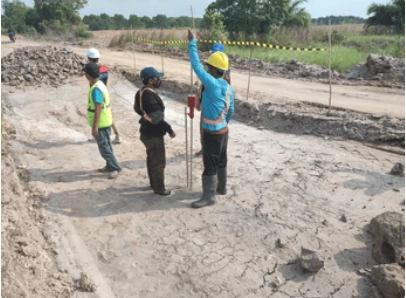
Experienced technicians begin with a walkover to inspect:
They identify appropriate test depths and safe locations for drilling. Clear marking ensures a systematic testing layout.
A small pit or borehole is created at the planned depth using specialised equipment. The test location is prepared so the thermal probe can be placed accurately in situ.
The thermal needle probe — a specialised sensor containing a heater and temperature sensor — is gently inserted into the prepared soil. Placement depth is carefully recorded.
The heater of the probe is subjected to a regulated electrical current. At predetermined intervals, precise temperature readings are made as the soil warms. Engineers are able to determine the soil thermal resistivity of the surrounding ground thanks to this rising temperature data.
Technicians ensure:
This data becomes part of the official testing report.
All equipment is retrieved, holes are backfilled, and probes are taken out after measurements are finished. The site is left clean and safe, prepared for additional research or building.
After field data collection, engineers may:
Accurate field testing ensures your design accounts for real-world soil behaviour — minimising risk and maximising performance.
For accurate soil resistivity testing and reliable geotechnical insights, get in touch with Tempsand Pty Ltd today, or call 0429-674-334 for more information.

